Why Centralized Version Control Is a Must for Your Team
Why Centralized Version Control Is a Must for Your Team

A version control tool helps development teams collaborate on projects, which is why even small teams need it. However, the larger a team gets, the more important it becomes. They allow you to easily track and manage changes to code, which will make it much easier to manage larger projects with a lot of contributors.
Three Types of Version Control Systems:
- Localized Version Control System:A local version control system is a local database located on your local computer, in which every file change is stored as a patch. Every update of files is listed in a patch.
- Centralized Distributed Version Control System:In Centralized Distributed Version Control System, all the changes in the files are tracked under the centralized server. The centralized server includes all the information of versioned files and a list of clients that check out from the central place (Example: SVN)
- Distributed Version Control System:In Distributed Version Control System, every developer has a repository. If Any server dies, any of the client repositories can be copied onto the server which helps restore the server (Example: Git)
An Introduction to SVN
SVN stands for Subversion. Apache Subversion or SVN is one of the most popular open-source, centralized version control systems. It comes under the Apache License. It is available for free over the internet. The subversion is an Apache product. We will first study the basic terminologies of SVN
Basic Terminologies
- Repository:It is a central repository where all project files and directories like source code, documentation, and test cases are stored. As an individual, you can work on the files on your own device. It maintains all the history information of a particular artifact, User can go back and look into the log to see Who, When, and Why has changed.
- SVN Checkout:It is the process of taking the project code or any files from the central repository to the local machine. Users can do modifications and can save all changes locally.
- Commit:
It is the process of saving all changes from the local machine to the Central Repository. During the commit, we provide meaningful commit messages for other users can easily understand.
To complete the installation of SVN, we need to install the SVN server and SVN client. Let’s see how to install the SVN server for windows.
How to set up Visual SVN Server on windows?
- Navigate to “https://www.visualsvn.com/downloads/ “
- Download – VisualSVN Server

- Once the Visual SVN server is successfully downloaded on your machine, click on that
- Run the installer file. It will prompt the installing option. Click Next to continue.

- Accept the terms and conditions and click next to continue

- Select the Visual SVN Server and Administration tools and then click on Next to continue

- Browse the location and click on Next to continue the installation

- The next step is the Authentication Mode. Select the Use Subversion authentication and click on the Next to continue

- Click on Install

Here we have successfully installed the SVN server.
Visual SVN Users & Access Permission:
We can create the user to whom we want to give access to the SVN server. Also, we can set the accessibility for every us.
Few below steps need to follow:
- Open Visual SVN Server, and Right click on User for creating a new user then enter username, password and click on the ok button

- you will see, an Apurva user is created

- The next step, Right click on Repositories for creating a new repository and click on Next

- Now, it will ask for the repository name. Type a repository name and click Next to continue

- Choose the repository layout, whether you want to create an empty or single-project repository. It is recommended to create an empty repository so you can make it as you want. Click Next to continue.

- We will set the initial access permission for the new repository. Kindly choose your desired access permission. However, we can edit it anytime. Click Finish to complete the process.Now, we have selected as -Nobody has access and click Next to continue

- Click on Create

- You will see, Repository Created Successfully. It will display the repository type, repository name, repository URL, and access permission.

- Right click on the myrepo1 repository then click on properties for adding users and give permission to them and click on OK

TortoiseSVN:
It is a revision control, version control, and source control software for windows. TortoiseSVN is a free open-source client for the Apache Subversion version control system that is used to communicate with the SVN server. TortoiseSVN manages files and directories over time. Files are stored in a central repository. The repository has the same structure as a regular file server, but remembers all changes to your data. This makes it possible to recover older versions of your files and see what exactly changed and when, who made the change.
How to set up TortoiseSVN on Windows?
- Navigate to https://tortoisesvn.net/downloads.html URL for download TortoiseSVN. Please make sure that you choose the right installer for your PC, otherwise, the setup will fail.
- Once successfully downloaded, Click on that file and Click on Next to continue

- The next step is to read the license agreement and click Next to continue the installation.
- Browse the location and select the features you want to install. Click Next to continue the installation.

- Click Install to complete the installation.
- We have successfully installed the TortoiseSVN client for the SVN server.

Let’s see how to create a repository, and how to use SVN Check out and commit changes in TortoiseSVN
Follow the below steps:
- Now you can Create one folder in any drive on your machine. We have created the ApurvaMyrepository1 folder in D Drive. Then Right click on that folder, click on SVN Checkout

- You will see the below type of window, just click on OK (You can modify the URL of the repository)

- The next step, enter your username and password for Authentication, Click on OK

- You will see, Checkout is finished

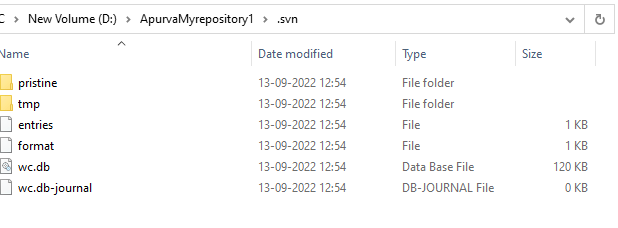
- Refreshers your folder. If you are not able to see the .svn folder, then make sure that click on the Hidden items checkbox otherwise you not able to see the .svn folder on your machine.
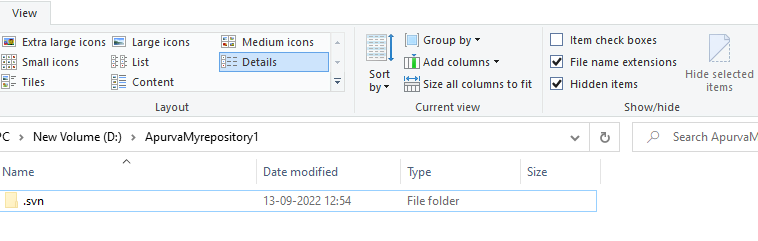
- ApurvaMyrepository1 repository will look as follows:
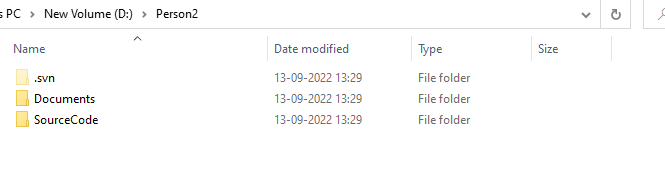
- Under the ApurvaMyrepository1 folder, You can create new folders as Documents, SourceCode

- Under Documents folder, add a few any images file

- Go to the ApurvaMyrepository1 folder, right-click on that and choose SVN Commit. you will see the below window. You can check all options and messages. Click on OK

- Now You will see Commit is finished. Just click on ok

- To create a new folder as Person2 in any drive, Right click on that folder. Select SVN Checkout and click on OK

- You will see, that all files are showing under the Person2 folder
How to Get Started with Command Line Subversion on Windows
In this part, we cover the basics of command line Subversion, from checking out a working copy to making your first changes and committing them back to the repository.
Steps:
- Open the command prompt
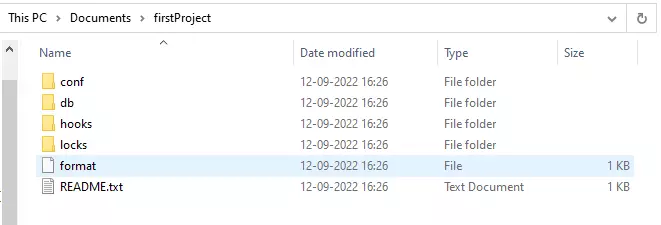
- In order to create your first repository, use the svnadmin create command followed by the path where you want the new repository and its name. For example,
svnadmin create C:\Users\apurva\Documents\firstProject

- Follow the same path(C:\Users\apurva\Documents), You will see a new folder called ‘firstProject.’

- In the Documents folder some new files.Do not delete or modify any of these files.
Advantages of SVN:
- Quicky retrieve versions of code repository through the checkout process
- More developers can work on the same code at the same time
- SVN has a built-in permissions system for user accounts
- Everything you commit will be securely hosted on servers that are frequently backed up
- You can track and download a subdirectory of the repository
- Itts helps to maintain a current and old version of files such as source code files, and other documentation.
- It allows users to revert files to the previous version
- SVN provides the Checkout command to check the working copy of your repository
Conclusion:
In conclusion, using a centralized version control system is a must for any team that wants to be able to work efficiently and effectively. By keeping all of your code in one place, you can ensure that everyone on your team has the most up-to-date versions of all files, which makes it easy to track changes and make sure that nothing gets lost in the shuffle. If you haven’t already made the switch to using centralized version control, now is the time to do so.
